While the Advanced Social Media Module (Oktopost) provides metrics for all types of social media engagement within that platform, the integration with Act-On relies on a conversion event, such as a form submission, to populate your Act-On integrated list with clickthrough data. The following article provides step-by-step instructions for successfully producing these conversions and communicating them between the two platforms.
Essentials to Getting Started
First, complete the steps in Setting up the Advanced Social Media (ASM) Module to integrate your Act-On instance and identify the marketing list you wish to capture conversion data to. Then, include Oktopost's custom fields in your Act-On standard field names and apply them to your chosen marketing list.
Outline of Steps
- Apply Act-On's version of the Oktopost tracking script to your form.
- Apply the original version of the Oktopost tracking script to the landing page to which your form redirects.
- Create a matching conversion in Oktopost.
- Test your forms via an Oktopost social clickthrough and view the results in Act-On.
Add the Tracking Script to your Form
Your Oktopost account provides a tracking script located in Settings > Tracking. Below is a modified version of that script, specifically for your Act-On forms. This modification allows the form to load completely before the code is interpreted.
  <script>
  aoPostLoadCallback = function(){
  (function(a, b, c, d, e, m) { a['OktopostTrackerObject'] = d; a[d] = a[d] ||
  function() { (a[d].q = a[d].q || []).push(arguments); }; e = b.createElement('script');
  m = b.getElementsByTagName('script')[0]; e.async = 1; e.src = ('https:' === document.location.protocol
  ? 'https://' : 'http://') + c; m.parentNode.insertBefore(e, m); })(window, document,
  'static.oktopost.com/oktrk.js', '_oktrk');
  _oktrk('create', '001cwoyyjytro14');
  };
  </script>
Note! The final line in the script above contains an ID reference that is specific to the Oktopost account. In your script here, _oktrk('create', '001cwoyyjytro14'), the ID must match the one provided for your account. This is located in the standard version of the script within Oktopost.
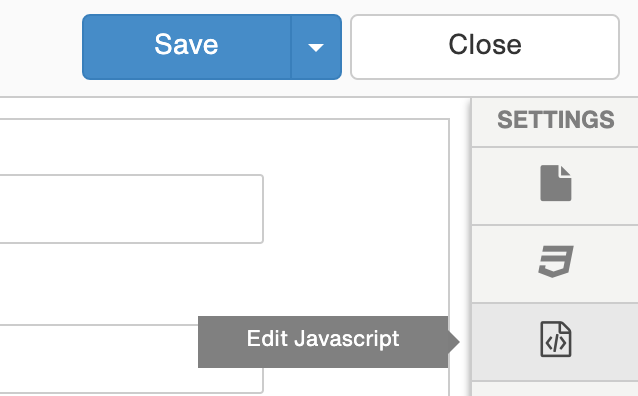
Additional Note! In Classic Forms, add the tracking code to the 'External Web Analytics Support' section of Settings.
Standard implementation requires the form to be embedded in an Act-On landing page. There are more details on alternate implementations provided below. Place the script above in the JavaScript editor located in the Design tab of your landing page where the form is embedded.
Add Tracking Script to the Landing Page
Generally, your form will redirect to a new "Thank You" landing page upon submission. This destination page is defined in the form's Properties tab. Similar to the step above, you will need to place the original, unmodified version of the Oktopost script in the JavaScript editor of your "Thank You" page.
Create a Conversion in Oktopost
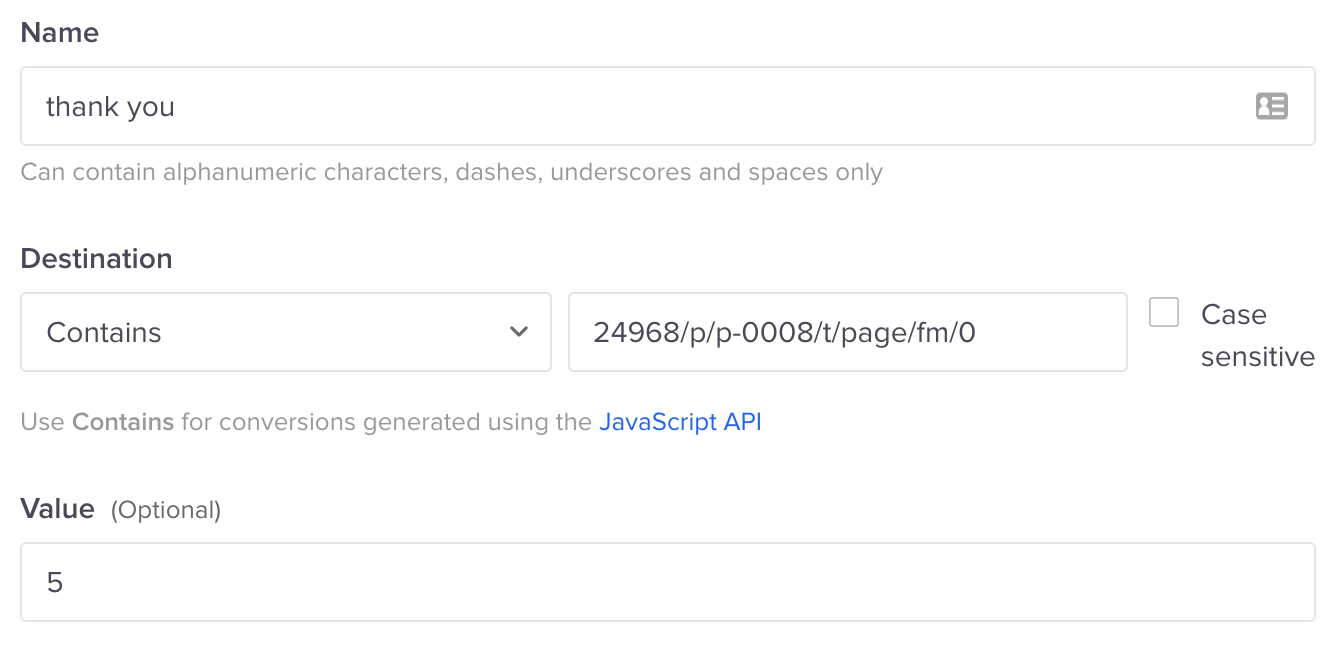
Once your resources are in place, define a conversion within Oktopost to capture the relevant data. Navigate to Settings > Tracking > Conversions and create a new “Destination” conversion type. Use “Contains” to match the URL of the “Thank You” page. Do not include the domain in your "Contains" field.
Test an Oktopost Link and View the Results in Act-On
Test your conversion by posting content to any of your connected social profiles. Learn more about Scheduling Posts in ASM. Your content should include a link that directs users to your form page. Submitting the form will produce the standard results in your form's submission list, including the Oktopost UTM parameters in the form URL.
Shortly after, the most recent click data will populate the custom Oktopost fields included in your integrated marketing list. If no previous record associated with that email exists, a new lead will be created. The clickthrough will also be recorded in the record's Contact Report timeline as a Website Page View.
This data can then be used for segmentation and scoring, the same as any other profile type data. The integrated list can be targeted by list maintenance programs to further associate contact data with social click results.
Note! Conversion data can take up to 20 minutes to refresh to the Act-On list.
Alternate Implementations
Your Act-On form may need to redirect to a page on your site rather than an Act-On landing page. In this case, place the unmodified version of the tracking script within the HTML of your webpage and include the URL values necessary to match within your Oktopost conversion. If the Act-On form is also embedded on your site, place the modified version of the script on that webpage along with the form's embed script.
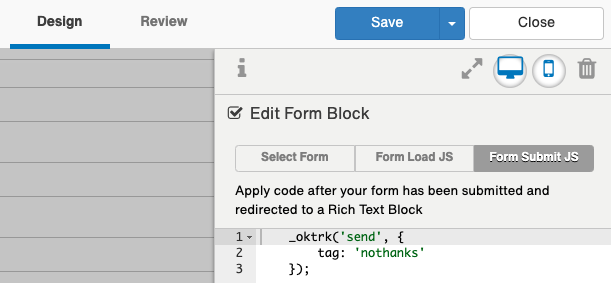
Finally, not all form submissions redirect to a new page. An example would be an Act-On form using the Rich Text block as its redirect method or a redirect to a PDF. If the URL does not change on submission, you can define an "Events" type conversion in Oktopost and utilize the provided JavaScript API in conjunction with the tracking code to complete the conversion.
  _oktrk('send', {
  tag: 'Example'
  });
Use the snippet above in the Form Submit JS section, which can be found by clicking on the form within the landing page's Design tab.
This will produce an "Events" type conversion in Oktopost. The "tag" value corresponds to the name of the conversion defined in Oktopost. If no conversion of that name exists, one will be created on the initial submission.
If the form is not using an Act-On landing page, you will need to work with your web developer to trigger this snippet after the form submission event. In this manner, lead data can also be sent programmatically along with the conversion type using the JavaScript API, for example:
_oktrk('send', {
tag: 'Example',
value: 100.00,
firstName: 'John',
lastName: 'Doe',
email: 'john@ibm.com',
company: 'IBM',
country: 'US',
state: 'NY',
city: 'New York',
zip: '123456'
});
Next Steps
Custom profile scoring can be applied to your Oktopost data. Learn more about Advanced Social Media - Lead Score Setup.
You can learn more about your Oktopost integration, including content creation, campaign reporting, and managing user and social profiles in our article The Advanced Social Media Module - All Articles and Guides.