Make it easy for your sales team to stay in touch with prospects and customers using professional, on-brand email messages. By creating pre-approved email templates and making them available to Act-On sales users, you ensure consistent messaging while enabling Sales to send emails in just a few clicks.
Create the email templates and a new folder
- Create the email templates your sales team will use, following the steps in Create an Email Template .
- Create a new folder for these templates, as described here .
- In the folders area of the Email Templates Manager, click the person icon to manage sales access:
- Locate your new folder and toggle the switch to On (show for sales users).
Add or move email templates into the folder
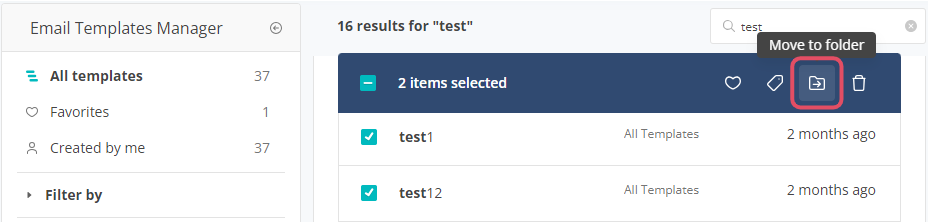
- Find the email templates in the main list. You can use the search (upper right) and filters (left side) to locate them.
- Hover over a template, click the menu icon, and select Add/Move to folder:
- Click Select a folder, search for and select the destination folder, then click Add/Move here followed by Add/Move.
Tip: To add or move multiple email templates at once, select the check boxes next to the templates in the main list, then click Move to folder (upper right) and follow the same steps above.
Note: Controlling Sales Users’ access to email template folders using Sales Enable is available when using Salesforce CRM integrations or Act-On Anywhere. This capability is not available in the Sales Portal for users without a native CRM integration.